Strawberry Rhubarb pies always make me think of Karla’s and my grandmother’s old house in Milwaukee, Wisconsin. It was a super house: multiple levels of flowers in the front leading up to a colorful door and enclosed porch, a big living room with two pianos and an organ, a bathroom full of cat replicas, and a carpeted little staircase up to the third floor that was always lined with stuffed animals. It had all the requisite grandma’s house charm, and even a fluffy long-haired cat, rotary phones, and a scary basement.
The kitchen was something else. Stained glass on the walls, armies of magnets on the fridge, I can’t remember the details very well now, but it always seemed very crowded. I do remember using tiny little spoons, with presidents’ faces on them, to devour one of our grandma’s two specialties: heaping Schaum Tortes and pieces of Strawberry Rhubarb pie.

My “L” for Louisville pie. Something of a crust-design failure, but still a beautiful golden-brown! (Yes, my bracket won. No, I don’t know anything about NCAA Basketball.)
The rhubarb usually came from her garden, where the stalks burst out of the ground like weird red celery. I always remember thinking that it was the oddest looking fruit I had ever seen. (Fun fact: rhubarb actually IS a fruit. I quote Wikipedia: “Rhubarb is usually considered to be a vegetable, however, in the United States, a New York court decided in 1947 that since it was used in the United States as a fruit, it was to be counted as a fruit for the purposes of regulations and duties.”)
So, nowadays, in April and May, when Rhubarb comes to town, (it’s very difficult to find fresh out of season,) I can’t help buying some and throwing together a pie.
This recipe is a mish-mash of a few recipes I read. It’s mostly Mark Bittman’s “How to Cook Everything” Crust, with Smitten Kitchen’s “Strawberry-Rhubarb Pie, improved” filling. I have never used tapioca as a thickener, as I bought a can of cornstarch a long time ago and haven’t gone through it yet. I have never found a way of making a filling so solid that it doesn’t run all over the place, but this pie is freaking YUMMY, and the mess isn’t really a big deal.
Sculpting the crust of the pie is really my favorite part. I love working with the dough to make some lovely creations. Here are some ideas if you’d like to play around with making your pie really pretty. For advanced dough workers, I especially endorse the braided crust: Martha Stewart Ideas, Braided Crust, RecipeTips.com.
Strawberry-Rhubarb Pie
Ingredients:
For the crust (Note: you’ll need two crusts for a standard pie)
– 1 cup plus 2 tablespoons all-purpose flour
– 1/2 tsp salt
– 1 tsp sugar
– 1 stick butter
– 3 tbs ice water (or more as needed)
For the filling
– 3 1/2 cups (about 1 1/2 pounds, untrimmed) rhubarb, in 1/2-inch thick slices
– 3 1/2 cups (about 1 pound) strawberries, cut in halves if small; cut in quarters if large
– 1/2 cup granulated sugar
– 1/4 cup light brown sugar
– 1 tbsp lemon juice
– 1/4 tsp salt
– 1/8 cup cornstarch or 1/4 cup quick-cooking tapioca
– 2 tbsp unsalted butter, cut into small pieces
– 1 large egg yolk beaten to blend with 1 teaspoon water (for glaze)
Notes: 1) For the flour: If you want to make this healthier, you can replace about 1/3 up of the flour with wheat flour without affecting the taste. If you really want to be healthier, probably don’t make a pie. 2) For the ice water: I usually start off the whole process by taking some ice and putting it in a glass of cold water. That way, when you get to that step, you have a glass of really cold water hanging out. It’s pretty essential to keep the dough very cold. 3) For the strawberries: Many recipes want you to slice the strawberries. That will be totally fine. I just like the strawberries chunkier, since they really turn to mush once you cook them. At least the larger pieces still give you big bites of strawberry. 4) For the light brown sugar: If you don’t have light brown sugar, but you do have molasses, this is brilliant: !!!!!! 5) DO NOT skip the glaze. Also, use this glaze forever, for every pie you ever make.
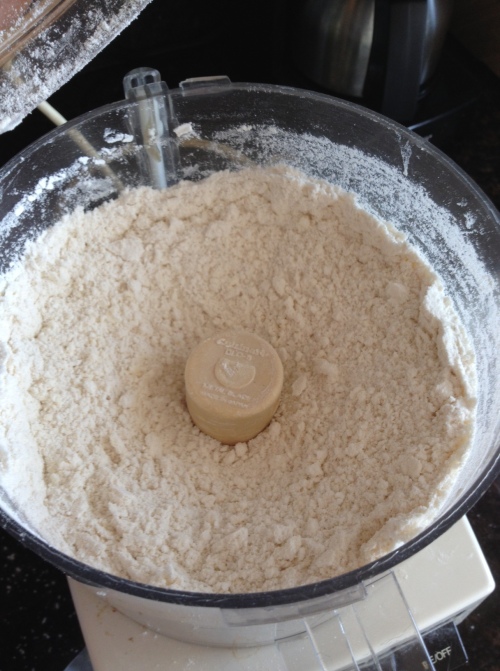
- Combine the flour, salt, and sugar in the container of a food processor; pulse once or twice. Add the butter and turn on the machine; process until the butter and flour are blended and the mixture looks like cornmeal, about 10 seconds.
- Place the mixture in a bowl and sprinkle 3 tablespoons of water over it. Use a wooden spoon or a rubber spatula to gradually gather the mixture into a ball; if the mixture seems dry, add another ½ tablespoon ice water. The water will seem insufficient to make the dough wet. Be patient and keep stirring. When you can make the mixture into a ball with your hands, do so. Wrap in plastic wrap, flatten into a small disk, and freeze the dough for 10 minutes (or refrigerate for 30 minutes); this will ease rolling. (You can also refrigerate the dough for a day or two, or freeze it almost indefinitely.)
- While you’re waiting for your pie dough to cool, make the pie filling. This is an easy one: Mix together rhubarb, strawberries, sugars, lemon, salt and tapioca in a large bowl. Preheat the oven to 400 degrees F.
- Sprinkle a countertop or large board with flour. Unwrap the dough and place it on the work surface; sprinkle its top with flour. If the dough is hard, let it rest for a few minutes; it should give a little when you press your fingers into it.
- Roll with light pressure, from the center out. (If the dough seems very sticky at first, add flour liberally; but if it becomes sticky only after you roll it for a few minutes, return it to the refrigerator for 10 minutes before proceeding. I find it infinitely more difficult to work with pie dough when my kitchen/the world is very hot. Try to do this somewhere cool.) Continue to roll, adding small amounts of flour as necessary, rotating the dough occasionally, and turning it over once or twice during the process. (Use ragged edges of dough to repair any tears, adding a drop of water while you press the patch into place.) When the dough is about 10 inches in diameter, hold your pie plate upside down over it to check the size. (If you have a really deep pie pan, like I do, make sure that your dough is a few inches longer in diameter than the pie plate.
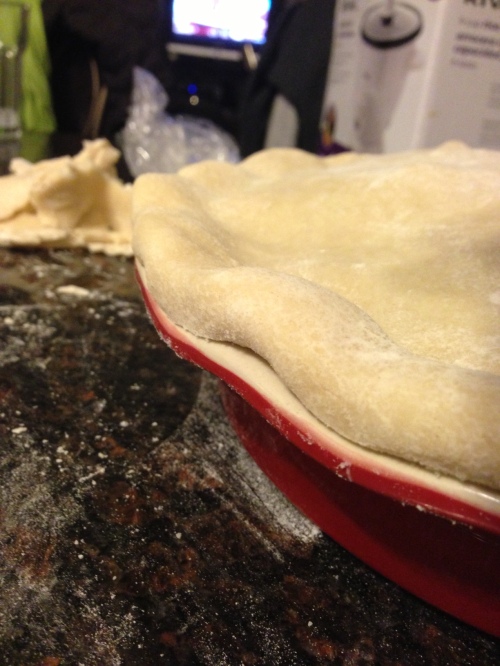
- Move the dough into the pie plate by draping it over the rolling pin or by folding it into quarters, then moving it into the plate and unfolding it. When the dough is in the plate, press it into the bottom, sides, and junction of bottom and sides. Once you have the bottom layer down, leave the edges ragged and heap the filling inside. Then lay the crust on top. Trim the excess dough so that about ½ inch hangs over all around, then tuck it under itself around the edge of the plate. Decorate the edges however you want! The easiest way is to press little grooves into it with a fork. Cut ventilation holes or slits in the top of the pie.
- Brush the egg yolk and water glaze all over your crust. Really cover it, and don’t worry if a little of the glaze pools here and there. That’s unavoidable.
- Bake for 20 minutes then reduce temperature to 350 degrees and bake for an additional 25 to 30 minutes, until the pie is golden and the juices bubble visibly.
- Let the pie cool to room temperature before serving. This will take several hours.


